How to Clean Gardening Tools
How to Clean Gardening Tools
<< BackGardening tools need regular cleaning, preferably after every use. However, they should be thoroughly cleaned before they are stored away for winter following excessive use in the warmer months. Garden work not only feels better with clean tools, but the job gets done more efficiently and effectively – not to mention cleaner tools are easier to use and last longer. The question is, which tools need cleaning? The answer is simple. Any tool that has screws, nuts and bolts, chains, and/or blades will regularly maintenance. This includes but is not limited to hedge shears, reel mowers, pruners, axes, loppers and more. Here are some simple steps you can take to clean your garden tools to keep them functioning effectively for longer:
Step 1: Clean the Tools
The first step for cleaning gardening tools is to get rid of all the dirt that’s accumulated over time. Sap and dirt left clinging on garden tools can carry weeds as well as a number of soil borne diseases to other parts of your garden. Dirt also attracts moisture and holds it which can lead to the onset of rust. If your garden tools have moving parts, make sure you disassemble them first before cleaning. Using a wire brush, clean the dirt and rust from all the metal surfaces. You may use steel wool to remove the more stubborn rust. If you have some larger tools, you can also use a medium-grit sand scraper. Make sure you thoroughly dry all the tools to prevent any build-up of moisture.
Step 2: Use Sand Tools
The second step to cleaning your garden tools is smoothing out all the wooden handles using a medium-grit sandpaper. This will help remove any splinters and get rid of the deteriorated finish. Sandpaper can also be used to remove any rust that may remain on the crevices and surfaces. It also serves to lightly polish the metal. Once you are done, it’s important to wipe the tools down and remove any metal or wood sanding that may remain.
Step 3: Sharpen the Pruners
Once you have cleaned your gardening tools and removed unwanted rust, the next step is to sharpen them. Let’s start with pruners and other beveled blades. You can use a whetstone to get a sharp cutting edge, rubbing the beveled side of the blade against the whetstone and in a curved motion. Rub the sharp edge of the blade towards the stone, and try and maintain the original angle or bevel when sharpening. You should first remove the burrs from the flat surfaces and then go on and sharpen the beveled side of the blade only.
Step 4: Sharpen the Remaining Tools
Once you have sharpened the pruners, the next step in cleaning your garden tools is to sharpen your other tools. You can use a medium or fine grit to sharpen loppers, shears, spades, hoes and shovels. Also use a single-cut mill bastard file after the grits. Make sure you always push the file away from your body. Do not use oil whilst sharpening the blades as the file’s serrations will be clogged by the accumulation of metal fillings. Some tools may require more frequent upkeep than others depending on your garden’s needs, but optimizing the sharpness of your tools will keep them functioning longer.
Step 5: Lubricate the Tools
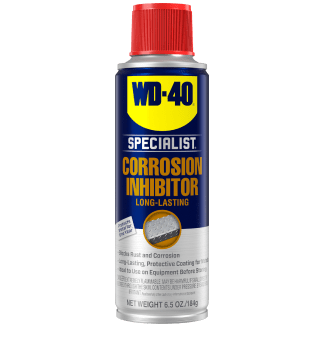
This is one of the most important steps when it comes to cleaning garden tools and keeping them safe from moisture, rust and corrosion. Cleaning alone is not enough for the long life of garden tools, it’s important you lubricate them to keep them safe from environmental factors that cause their wear and tear and corrosion. The best product to lubricate garden tools is WD-40® Multi-Use-Product. Thanks to its fasting acting and unique formula, a simple application will prolong the life of your garden tools and help ensure efficient performance. What’s more, the lubricant keeps the garden tools protected from rust and corrosion all year round.
Step 6: Preventative Maintenance
Now that you are done with cleaning your garden tools and they look as good as new, take some time out every couple of months to maintain them. Here are some preventive care tips to help keep your garden tools working efficiently, free from dust, moisture, corrosion and rust:
- Rinse off mud using a garden hose every time you use the garden tools. Wet soil clung to the tools is one of the main reasons of the rusting of garden tools.
- Use a scrub brush to quickly scrub away any stubborn soil. You can also use a paint thinner to remove pitch and sap.
- Use a towel or rag to wipe the tools dry before keeping them in the storage. You can also let them dry on their own by keeping them in the sun.
- Don’t stand the tools on their edges, hang them up instead.
- Wipe the surface with lubricants like WD-40 Multi-Use-Product periodically to keep them safe from rust and corrosion.
- Gardening tools should be stored in a dry place which is free from moisture after cleaning them.
Pro Tip: Use WD-40 Big Blast® to coat the blade of your shovel with a wide area spray. The formula protects against rust and corrosion, makes for smoother digging, and also prevents soil from clinging to your tools as you work.
FEATURED PRODUCTS
WANT TO GET MORE TIPS AND TRICKS?
SUBSCRIBE TO THE NEWSLETTER


