DIY Fence Building
<< BackAs The Family Handyman says, “Good fences may make good neighbors, but an ugly, flimsy or poorly built one won’t make anyone happy.” Building a fence in your yard can be a simple or complex job depending on what you want to create. Since you’ll want it to last for many years, however, it’s important to get the job done right. Read on to learn tips and tactics from professionals in the field to help craft a great do-it-yourself fence at your own home.
Choose your path
Depending on the intent and purpose of the fence, you may elect to install a fence from pre-assembled panels or build one from scratch using individual components. Prefabricated materials from wood, metal, plastic, or other mediums can save time and effort, but a customized fence is more versatile with options to tailor to your yard. You’ll also want to consider what restrictions and regulations apply in your area, whether they are mandated by government authorities, permitting processes, neighborhood charters, or other entities.
Craft your design
It’s a good idea to sketch out your fence on paper (or electronically) as you begin the design process for your fence. Once you’ve got an idea of what it will look like, mark the layout using stakes and twine in your yard to get visual to scale. This process will help establish where posts will go, give more accurate information for how much material will be required, and may show any troublesome spots you can counter before they become a hassle. Lowes Home Improvement has a great design guide on their website to get you started.
Gather construction materials
You’ve sketched, measured, and estimated what you’ll need for your fence. You should also have a good idea of what materials you use to construct it – whether it’s wood from a store, a set of premade metal or plastic components, panels for designs like a shadow-box fence, and more. You may even get creative with upcycling fence ideas using repurposed materials.
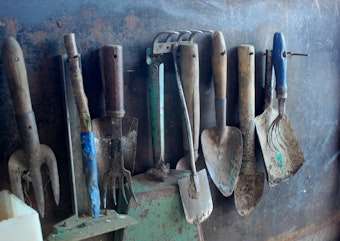
You’ll also need tools – most are fairly common in DIY household garages and sheds, but if you’re saving your back by using a power auger rather than a post-hole digger you may have one or two items to rent or borrow. FenceSupply.com outlines the basic tools you need to build a traditional wooden fence.
Build, Anchor, finish
With all your preparation complete, it’s time to get to work. The specific tasks for the job at hand will depend upon your design and circumstances, but this walk-through from The Family Handyman will help set a basic order-of-march. Be sure to plan for drying time after pouring the concrete, about 24 hours or so in a dry climate. Take your time and remember the mantra, “measure twice, cut once.” Painting the fence and applying caps to the top of wooden anchor posts will help the structure to endure the elements.
Side-note:
Even though this project is in the “do-it-yourself” category, don’t hesitate to ask for a hand from a friend, neighbor, or family member. Building a fence goes easier with a second person to hold things steady and provide a second eye, and it’s also a chance to bond and do something “constructive” together. Have fun and be proud when you finish.
Pro Tip: When cutting wooden posts, boards, and planks consider using WD-40 Specialist® Dry Lube on rotary saws such as miter and chop saws to reduce friction and wear on the blade without attracting dirt or sawdust.
FEATURED PRODUCTS


WD-40 Specialist® Dry Lube
WD-40 Specialist Dry Lube provides superior lubrication and long-lasting corrosion protection with no sticky residue. Best used where cleanliness and maximum performance are required as it dries quickly, leaving behind a lubricating film that resists dirt and dust buildup.
RELATED ARTICLES
How to Clean Gardening Tools: How to Clean Gardening Tools
It's time to get your tools out of storage and ready for that essential gardening season.
READ MORE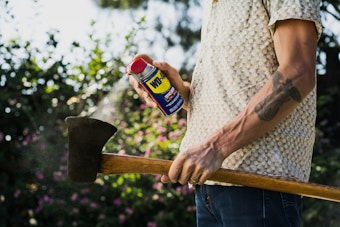
How to Chop Firewood Like a Lumberjack: How to Chop Firewood Like a Lumberjack
Get your fireplace up and running and learn how to chop wood like a true lumberjack.
READ MORE
How to Clean Gardening Tools: How to Clean Gardening Tools
It's time to get your tools out of storage and ready for that essential gardening season.
READ MOREWANT TO GET MORE TIPS AND TRICKS?
SUBSCRIBE TO THE NEWSLETTER