How to Build a Sturdy, Low-Cost Workbench
How to Build a Sturdy, Low-Cost Workbench
<< BackA workbench is essential to any garage, shop, or other location used for DIY projects, woodworking, and many kinds of hands-on work. While they can be bought at stores found second-hand, there’s nothing like working on a bench built by your own sweat and skill. You can customize it to your space and save on cost with some creative construction. If you choose to build a workbench from scratch or repair an existing one, read the steps below to ensure your bench is sturdy and built to last.
Step 1: Determine Your Needs
Before you begin building or repairing your workbench, you need to determine what you will be using it for. If you plan to use it for heavy-duty projects that require a lot of weight and pressure, you will need to build a bench that is sturdy and able to support the weight of your tools and materials – as well as the strength of your efforts. If you will be using your workbench for lighter projects, you can focus more on building a bench that is easy to move and store when not in use.
Step 2: Choose Your Materials
While the needs of the bench will inform your design, choice of materials is a great chance to get creative. Will you build it from scratch, or repair / repurpose the bench from another base material? Workbenches are most commonly made from wood, metal, and plastic. Wood is the most popular choice for DIY workbenches because it is relatively inexpensive, easy to work with, and provides a natural, rustic look. Metal workbenches are sturdy and durable but can be more expensive and difficult to construct without specialized skills & tools. Plastic workbenches are lightweight and easy to move but may be less sturdy or easy to repair.
Step 3: Design Your Workbench
A good workbench should be at least 3 feet wide and 6 feet long to provide enough space for your projects. It should be strong enough to support the weight of the tools, materials, and force to be used on it without wobbling or tipping over. Search online to check out different designs from professionals or people at home – here’s a video from Fix This Build That showing a bench build using low-cost lumber to get you started. As with other projects from Fix This Build That, you can find building plans used for designs in the videos here.
In addition to a resilient structure, you may wish to add other features to your workbench design such as shelves, drawers, and tool racks. For inspiration, check out this article from the Family Handyman featuring 29 ideas to upgrade your workbench. Just be sure not to overcomplicate your design to the point that you don’t finish the project.
Step 4: Build Your Workbench
Once you have your design sketched out, you can begin building the workbench. Gather your chosen materials (new or repurposed) and start with the frame. Spend time on this section because you want your foundation to be strong, level, and ready to support your future projects. If you are going with wood, choose 2x4s, 4x4s, or other sturdy lumber – with metal, you will need to weld the frame together or enlist a skilled friend to help.
For the legs, wood should be at least 4x4s or thicker. Attach the legs to the frame securely using bolts or screws. Check that they are level and square before proceeding, then move to the working surface of the bench. A workbench surface can also be made of inexpensive lumber as seen in the Fix This Build That video above, possibly free if repurposed or leftover from previous projects. You could also use a hardwood butcher block, cover the surface in sheet metal, or get creative with other working surfaces that suit the needs of your own shop or garage.
Repairing a Workbench
If you already have a workbench that needs work but still has good bones, consider repairing it instead of replacing it. To return a salvageable bench to functional condition, follow the steps below:
Step 1: Assess the Damage
Inspect the item closely from top to bottom. Feel for any wobbling or instability, as well as damage from water, rot, insects, or other sources. You may need to replace certain components such as the legs or working surface, or merely reinforce the existing material with additional support. Check that the horizontal surface is level and that the supports are plumb and note any items you’ll need to complete the repairs.
Step 2: Disassemble the Workbench
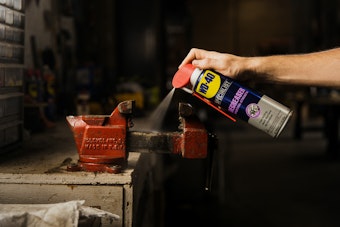
To repair a workbench lacking structural integrity, you may need to disassemble it. This will allow you to access the damaged components and reinforce or replace them. Separate usable components from those to be discarded, and keep track of any hardware you remove from the item. For bolts and other metal parts stuck due to rust or corrosion, use WD-40 Specialist® Penetrant to free the hardware without using excessive force.
Step 3: Replace Damaged Components
Once you have disassembled your workbench, remove any damaged or unsound components. If the legs are unstable, identify materials to use as new, sturdier legs. Replace or upgrade the working surface if necessary (or desired) using a new piece of plywood, a homemade or purchased butcher block, or another sturdy material.
Step 4: Reassemble the Workbench
After you have replaced any damaged components, reassemble the workbench with the original hardware or with new ones if necessary. Ensure that the legs are level and stable. Add any finishing touches to make it more functional or attractive, such as a coat of protective finish on the working surface. You can also add a vice, clamp, or other upgrades as mentioned in the Family Handyman article above.
Pro Tip: Coat metal components of your bench with a protective barrier against moisture to prevent the onset of rust or corrosion. Use WD-40® Multi-Use Product or try WD-40 Specialist Gel Lube for superior protection lasting up to one year.
Social:
A sturdy workbench is essential for anyone who enjoys hands-on work. Check out this article in the WD-40® Blog to learn more about how you can create or repair a low-cost workbench that is sturdy, functional, and built to last.
FEATURED PRODUCTS


WD-40 Specialist® Penetrant with EZ-REACH®
WD-40 Specialist Penetrant with EZ-Reach contains a proprietary blend of ingredients that work fast to free rusted bolts and other stuck parts. The capillary action penetrates into tight crevices, threads, and seams to break the bonds that hold stuck parts together.
RELATED ARTICLES
How-to Maintain Your Tools: Vises: How-to Maintain Your Tools: Vises
Whether you’re a mechanic, woodworker, or DIY enthusiast it’s great to show some love to the vise in your shop or garage and ensure it’s in good working condition when the time comes to summon the squeeze.
READ MORE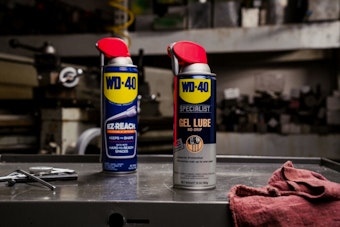
Rust Repair: Metal Surfaces
Help metal surfaces stand the test of time by protecting them against the formation of rust & corrosion and restoring metals after rust has already set in. Learn which WD-40® Brand Products work best for particular uses and how to apply them.
READ MORE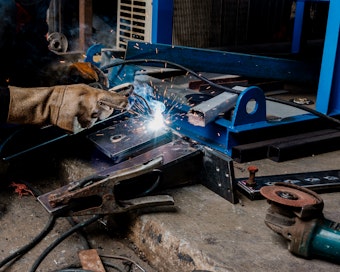
How-to Maintain Your Tools: Vises: How-to Maintain Your Tools: Vises
Whether you’re a mechanic, woodworker, or DIY enthusiast it’s great to show some love to the vise in your shop or garage and ensure it’s in good working condition when the time comes to summon the squeeze.
READ MOREWANT TO GET MORE TIPS AND TRICKS?
SUBSCRIBE TO THE NEWSLETTER