Waxing Skis and Snowboards
<< BackHitting the slopes this winter? Snow sports are expensive enough, so save some money and prime your gear ahead of time by waxing your own skis and snowboards. It’s not too complicated and requires only a few tools, so don’t worry if you haven’t attempted this task before yourself. There are a few tricks to know though, so read on below for how to wax your own gear like a pro.
What you’ll need:
- Skis and/or snowboard
- Clean cloth, rag or towel
- Temperature-specific wax
- Rubbing alcohol
- Waxing iron
- Plastic scraper
- Brush set (nylon, horsehair)
- Working surface (with ski/snowboard vise or other clamping method)
Choose your wax
For most recreational skiers, a universal wax is all you’ll need regarding temperature-specific waxes meant for snow sports. These are the most cost-effective types of wax, although certain high-end waxes with greater fluorocarbon content or other performance ingredients can satisfy an adrenaline-junkie’s need for speed. REI offers some fine wax options, most of which are applied by heat but if you need a quick fix there are parking-lot friendly rub-on waxes as well. For more information on wax specifics, check out the guide on RaceWax.com.
The waxing process:
- Mount your skis or snowboard on a working surface, fixed with a ski vise or with clamps (use jaw pads or a towel to avoid damaging equipment)
- Brush and scrape away material from the bottom of the skis or boards and clean the surface to be waxed with a cloth and rubbing alcohol.
- Heat the waxing iron (clothing irons are not ideal because of temperature fluctuation) and test to see if the wax will melt. Once ready, apply wax to the iron and drip a moderate line of wax across the length of the ski or snowboard.
- Use the iron to spread the wax across the entirety of the bottom surface, applying more wax if necessary. Signs of smoking indicate that iron is too hot.
- Spread wax at an even speed, moving slow enough so the melted wax penetrates into the skis or board but not so slow that the wax burns (be sure to watch for signs of equipment beginning to blister).
- Allow wax to cool (about one hour)
- Use a plastic scraper to peel wax from the ski or snowboard at a 45 degree angle. Apply long strokes using even pressure until no more wax can be scraped away and clear the sides and edges as well.
- Pass the nylon brush to across the length of the board or skis in long, sweeping strokes to clear wax from the “structure” of the equipment. Continue to brush until no more wax dust falls free.
- Finish the job with a soft horsehair brush for a clean polish.
- Stow gear in a ski or snowboard bag or equivalent and get ready to cruise down the slopes in style.
View a full video tutorial on YouTube for the complete waxing process.
ProTip: For last season’s well-worn snowboards and skis, use WD-40 Specialist® Cleaner & Degreaser to remove stubborn marks and scuffs before preparing the bottom surfaces for wax with rubbing alcohol.
FEATURED PRODUCTS

WD-40 Specialist® Cleaner & Degreaser
WD-40 Specialist Cleaner & Degreaser is a water-based, non-flammable, non-aerosol cleaner & degreaser with a unique bio-solvent formula engineered to be powerful yet safe on most surfaces. It quickly breaks through tough grease & grime and has added corrosion inhibitors to help protect against flash rust.
RELATED ARTICLES
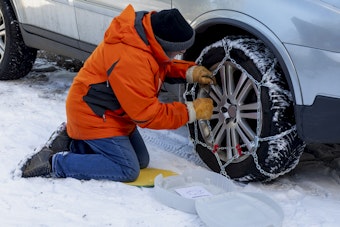
How-to Use Snow Chains: How-to Use Snow Chains
The last place you want to learn to use snow chains is in a storm on the side of a mountain. Learn the ropes of choosing and installing snow chains for your vehicle’s tires.
READ MORE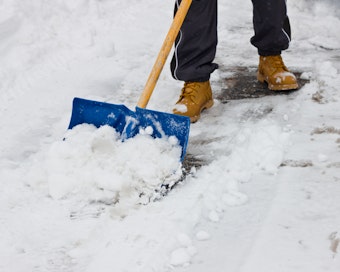
Top Tips to Remove Snow & Ice: Top Tips to Remove Snow & Ice
Don’t get left out in the cold this winter. Follow these tips to ensure you are ready to tackle the snow and get to where you want to go.
READ MORE
How-to Use Snow Chains: How-to Use Snow Chains
The last place you want to learn to use snow chains is in a storm on the side of a mountain. Learn the ropes of choosing and installing snow chains for your vehicle’s tires.
READ MOREWANT TO GET MORE TIPS AND TRICKS?
SUBSCRIBE TO THE NEWSLETTER